MDR-XB450AP Cable Repair
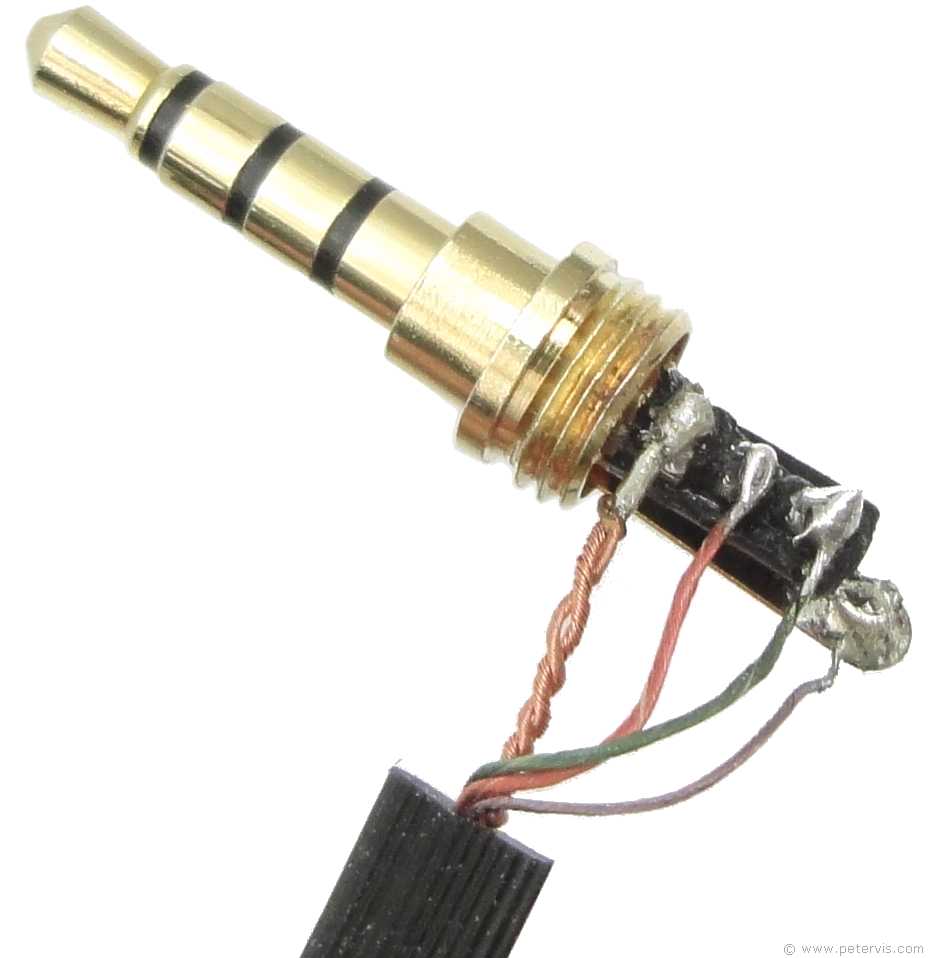
If your MDR-XB450AP requires a replacement cable, then this page shows the wiring colour scheme and how to repair the jack plug. A wire can break from many places such as the jack socket end, y-junction point, or near the ear cups. In my case they had broken off at the y-junction and neither cups produced any sound. Consequently, in this case, it was better to replace the complete wire, and I used a nice high quality hi-fi one that I had and soldered a new jack plug to it as well. However, I also took the liberty to reverse engineer the original jack plug and trace the wiring pinout should you need to replace the jack plug only.


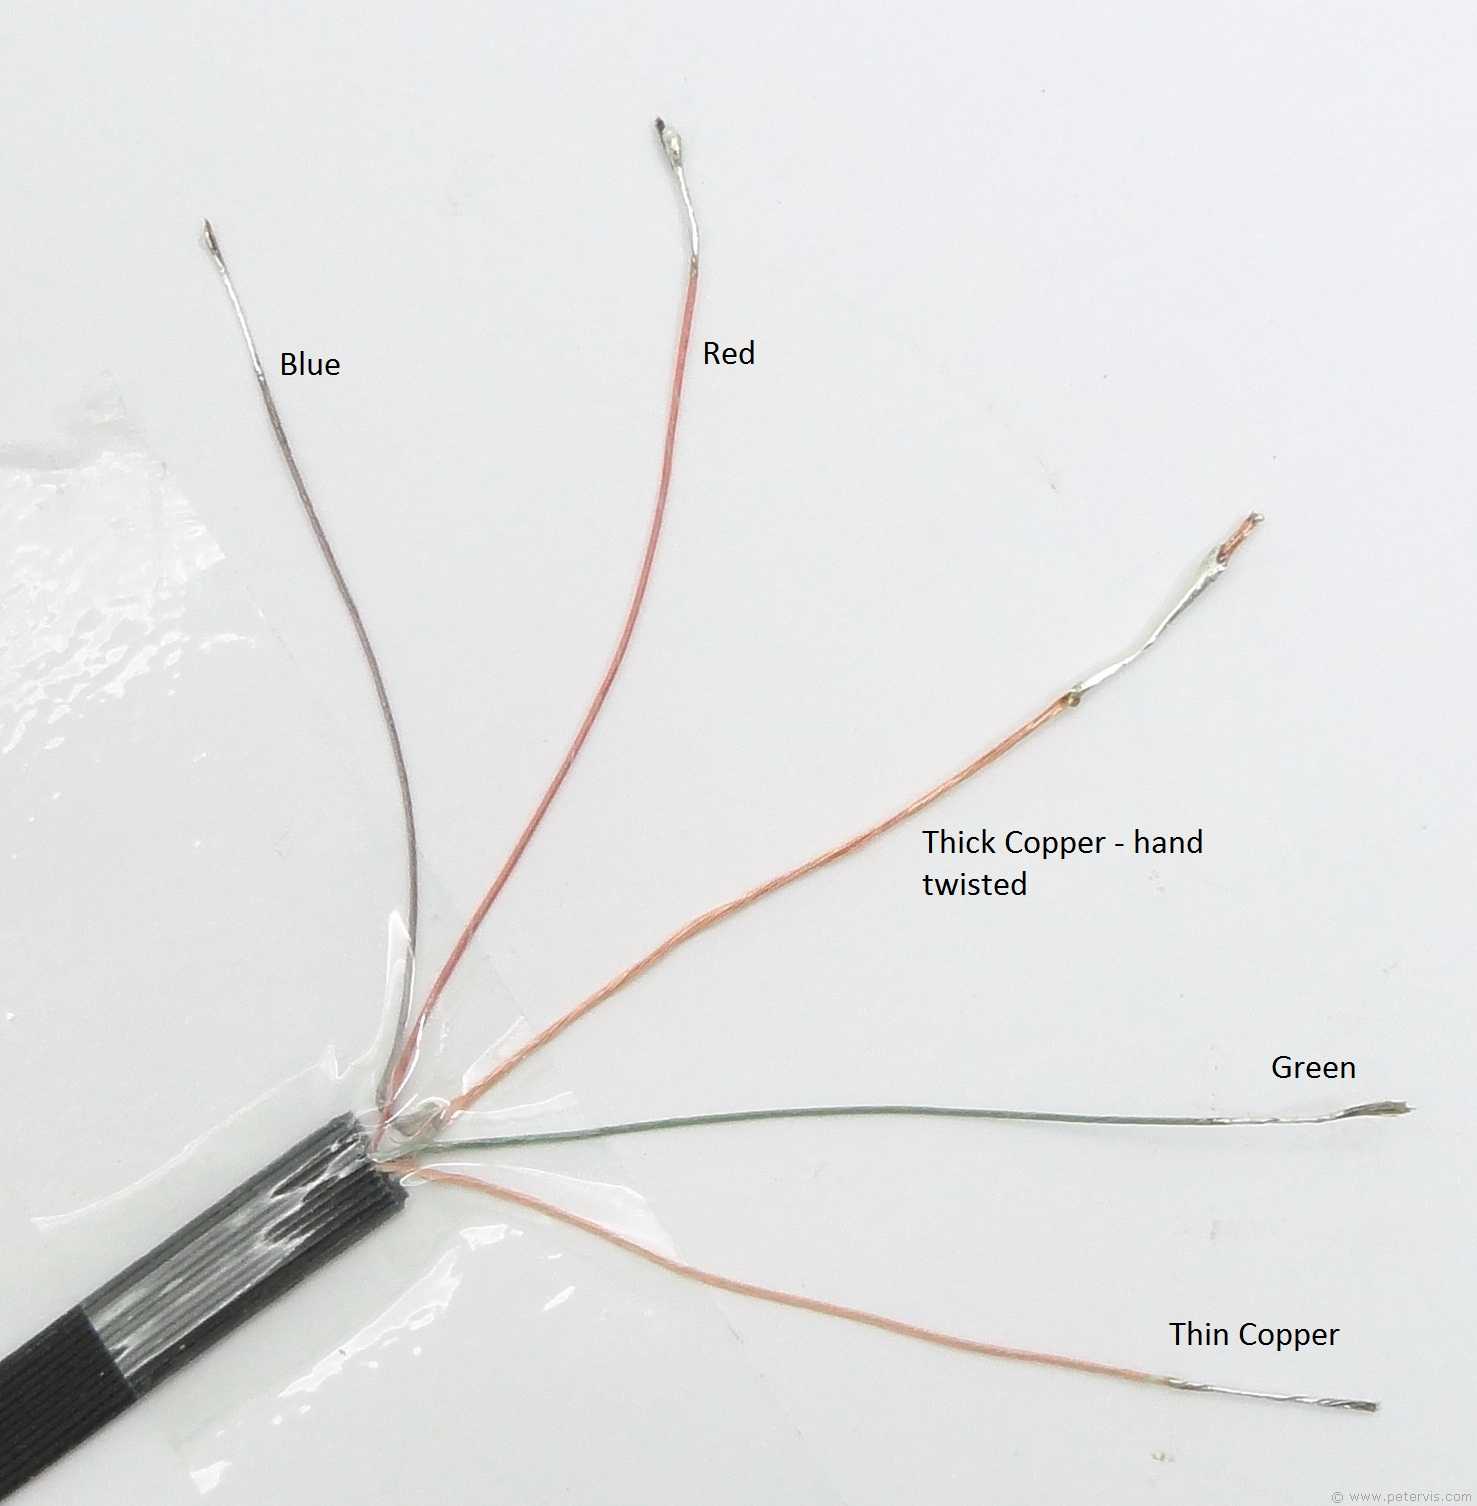
I opened the enclosure of the in-line microphone and switch to get an idea of the wiring. In this design, the thick copper wire, and blue wire connect to the microphone PCB, whilst the thin copper wire, red, and green, pass straight through.
When I stripped the wire at the jack socket end, I discovered that the blue wire, which carries the signal from the microphone, had a copper sheath/shielding which is earth. These two wires obviously have to be separated and the strands of the copper sheath twisted together to form a slightly thicker copper-coloured wire which connects to earth.
The thin copper wire and green wire emerge into the left cup, where the green caries the audio and copper is earth. The green wire connects to the driver terminal with a red spot marking next to it. In the right cup, there is a red coloured wire, and thin copper coloured wire emerging. The red coloured wire connects to the driver terminal with a red spot next to it, whilst the copper coloured wire is earth.
This Article Continues...
Sony MDR-XB450APHeadphones
Headband
Disassembly
Driver
Ear Pads
In-Line Mic
Cable Repair
Box
Unboxing