8 Band Crystal Radio Making the Coil
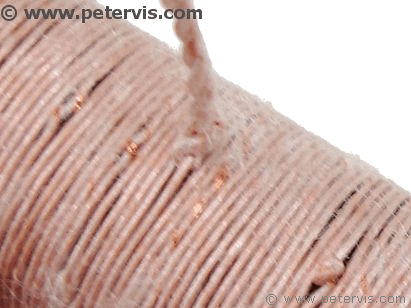
In the 8 band crystal radio coil, you will need to make taps. When you want to make a tap, cut the coil wire, tie a knot to join the two separate wires back again, and continue winding the coil. Later, you can twist the wires, scrape their ends, and solder them to another extension wire as shown below.

For the extension wires, I am using these nice colourful wires with their ends tinned.
I am using different coloured wires for each tap, starting with black, grey, red, orange, yellow, green, blue, purple, and pink. The centre connection from the switch selector pole will be brown.

Scrape the coil at the taps and solder a thin insulated wire to it. This should be done very carefully as this is a radio coil with a bundle of individually insulated wires inside. Therefore, many individual wires will require scraping.
I found that if you make a hot blob of solder and run the wire through it, pushing it along the wire, it permeates into the coil and makes a good electrical connection.
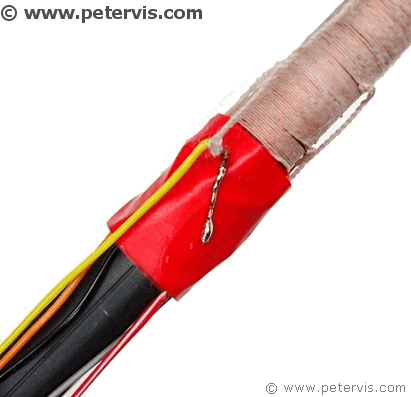
After soldering the wires to the coil taps, you will need to secure them with some insulating tape. You should also use a digital meter on a continuity setting to test the connection between the taps to make sure that the connection is sound and proper.
Check the connections between each tap, and then between the ground connection (the first wire of the coil) and each tap.
The other end of the wires solder directly to the selector switch. You will need to keep these wires as short as possible, and they solder to the switch in the colour sequence mentioned above.
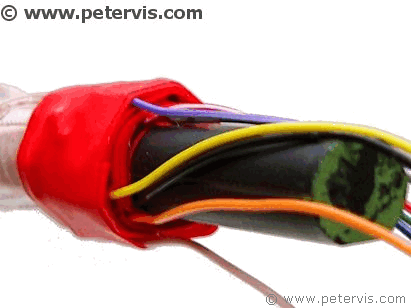
If you secure all the wires very neatly at one end, then it will look like this. Each wire has two layers of insulating tape.
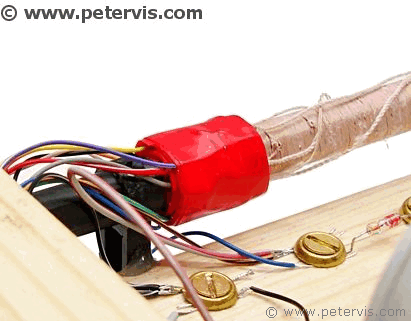
After assembling the coil, you install it back into The Little Whippersnapper's Crystal Radio. If you have not made the radio yet, then you first need to consult the article called: Making a Crystal Radio Electronics Lab
Related Articles
8 Band Crystal Radio (Project Ultra)Circuit Diagram
Stage 1:Making the Coil
Stage 2:Selector Switch Pinout
Stage 3:Installing Selector Switch
Stage 4:Wiring Circuit Diagram
