Beats EP Jack Repair

The Beats EP jack repair usually requires a replacement 4-contact 3.5 mm jack plug. The repair itself is straightforward if you have good soldering skills, and a jack wiring diagram, otherwise it is not recommended. The main problem you will face when replacing the jack is when you are soldering the common ground consisting of the copper coloured wires. These are usually twisted together and tinted and then they solder to the point marked common ground within the jack plug. As you can see, the actual point where they solder is very small and it can be very tricky to do so without melting the plastic separators and making a real mess.
One very common mistake people make is in assuming that the lug is the ground, however, in this 4-contact scheme it is actually the microphone connection!
If you feel you would be unable to solder the jack plug, then one alternative is to get a readymade wire that you can replace from the cup/driver side. I saw some cheap readymade wires with 4-contact jack plug and in-line remote and those could be adapted for use here to replace the complete wire. I have a wiring diagram for this in the following pages of this multi-page article.

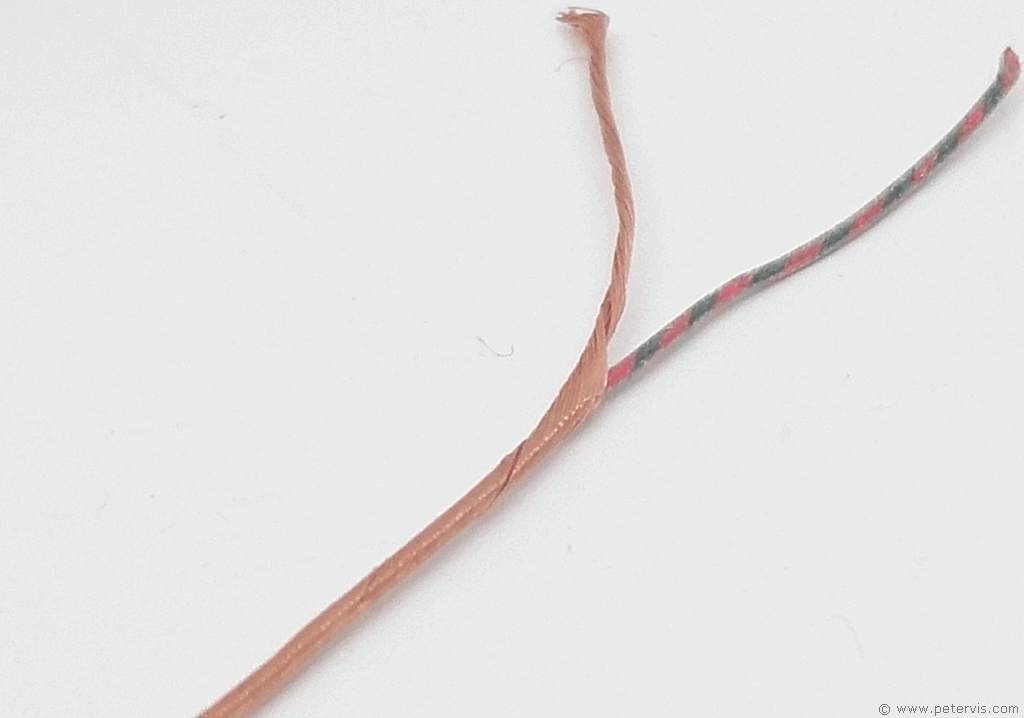
Whilst the right audio and left audio wires are easily identifiable, you will have problems distinguishing the microphone wires. However the photograph below shows the microphone wire in more detail so you know what to look for.

The microphone wire is an interesting one because at first sight it appears to be a thicker copper coloured wire, however if you unravel the copper-coloured shielding, then at the centre there is another bundle of wires forming green/red stripes. My impression here was that the outer copper-coloured wire forms a shield for the microphone signals.

Interestingly, we see the copper-coloured shield, and the green/red striped wires, connected to the PCB within the inline remote. These are the only two wires that connect to the PCB, whilst the others that carry the audio are routed straight through under the PCB.

As you can see, the L/R audio wires are routed straight through the remote control. These wires pass through the remote and then emerge inside the cup, and that is why the audio wires have the same colour scheme throughout. This is of course very useful to know if you plan to replace the whole wire from the cup/driver side.
This Article Continues...
Beats EP ML992ZM/ADriver
Removing Ear Pads
Ear Pads
Jack Repair
Wire Replacement Repair