Casio Cable Circuit Layout

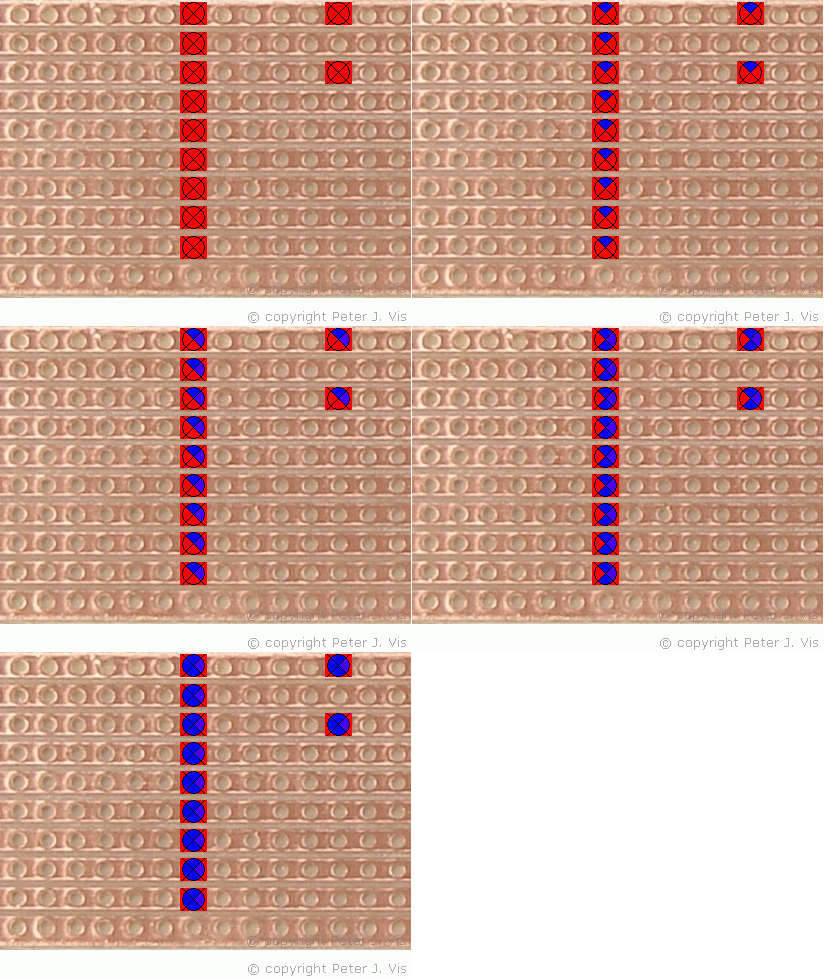
A small board is required to mount the components onto, and the diagram above shows the places where to cut the tracks. For cutting the copper tracks, you could use a drill, or a special track cutter. Remember that when you flip the board over, the cuts will be mirror reversed.
Component Side - Build

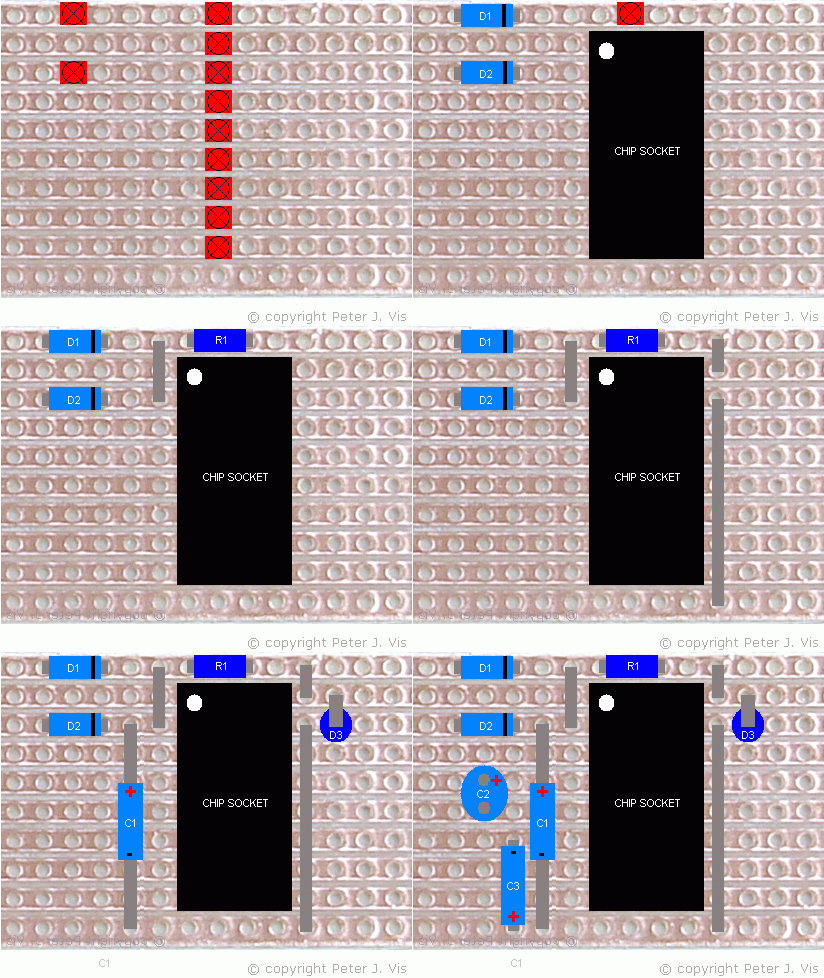
In this diagram, you can see the component side. I have also included an overlay of the tracks to visualise what is happening underneath. Boards such as these are readily available at electronics shops; hence, it pays to look around online for a bargain.
Edge Connections

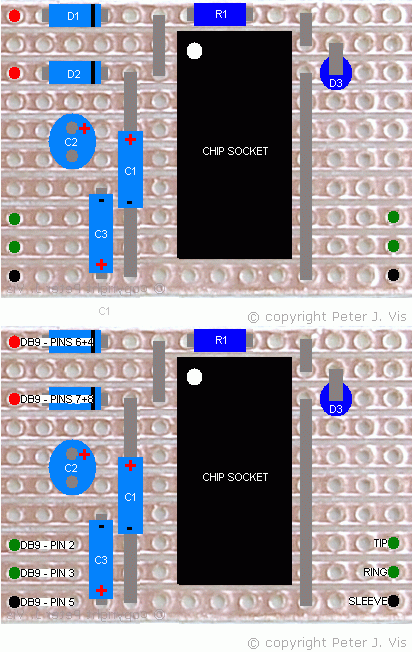
In this diagram, you can see the edge connections for wiring the board. Traditionally, these points should have pins soldered to them; however, you can solder wires directly to the board if you do not have any pins
The left-hand side terminals connect to the serial DB9 connector, whilst the right hand side connects to the 2.5 mm jack plug.
This Article Continues...
Casio Serial CableCasio Cable Circuit
Circuit Power & Serial Port Logic
Casio Cable Circuit Layout
MAX232 Basics for Students
Casio Serial Cable Components
2.5 mm Jack Plug Connection
Casio Serial Cable Circuit Build
Casio Serial Cable Test
Casio Serial Cable Compatibility
Casio Serial Cable Software Configuration