Sony NAV-U Car GPS Repair Opening

Before you open this GPS for repair, it might be a good idea to leave the unit switched ON until the batteries discharge and can no longer power the unit. You will need to open the plastic case if you wish to replace the batteries, or the digitizer, or the LCD, or any internal component.
Press the RESET button to switch the unit OFF, and remove the rubber plugs out of the 4 recessed holes at the corners. Then remove the Philips head screws, and use some thin strips of plastic card such as a credit card and wedge them through the seams to separate the two halves. You need to push on the plastic tabs / catches on the sides to release the two halves. You can see where the tabs are in the following sections of this article.

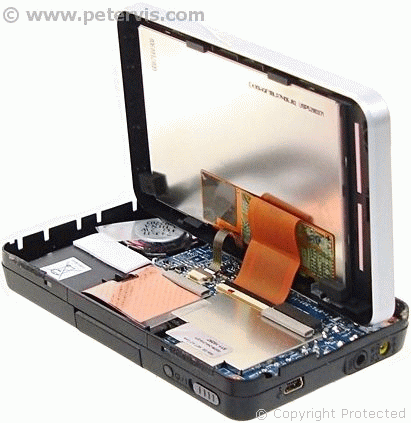
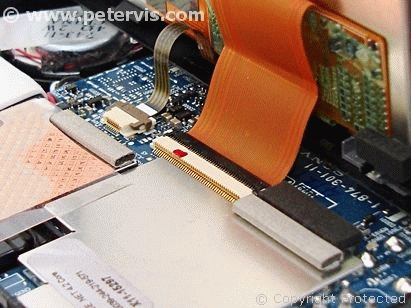
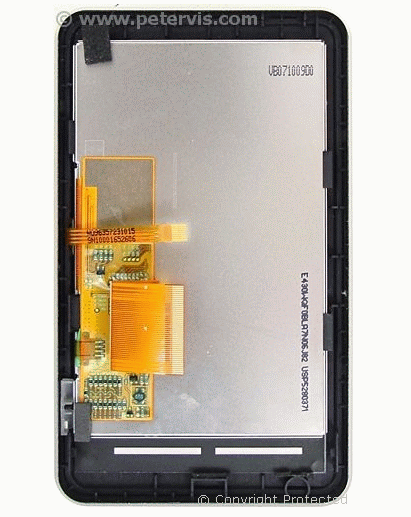
There will be ribbon cables connecting the LCD and the Digitizer touch panel to the main board. Be careful not to pull on these too hard otherwise the ribbon cables will damage if detached by force.

From the inside, you can see the design and manufacture. These units continue to operate for many years and are worth having.

Simply lift up the catches on the ribbon cable sockets to release the cables. There are two ribbon cables, and the wide one is for the LCD panel, whilst the narrow one is for the digitizer panel.

With the ribbon cables detached, the top half of the case containing the LCD and the digitizer panels separate away as shown above.
This Article Continues...
Sony NAV-USony NAV-U Repair
Sony NAV-U Car GPS Inside
Sony NAV-U PCB & Chipset
Sony NAV-U Car GPS Repair Opening
GPS Touch Screen Digitizer Repair
Sony NAV-U Car GPS LCD Replacement
Sony GPS Battery Replacement
GPS Speaker Replacement
Sony NAV-U Car Battery Adapter: XA-DC3
Sony NAV-U Car GPS Manual Book