Using PonyProg Software
Connect the ISP Cable to the computer’s COM port, and the other end to the development system. Power up the board, and make sure the power LED lights up.
STEP 2
Start PonyProg2000, and press OK to the two information windows requesting to perform calibration.
STEP 3
In the Setup menu, select "Calibration" option. Select OK, and OK again at the pop-up dialogues.
STEP 4
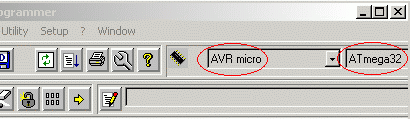
In the main window of the application, select AVR micro, and ATmega32 as the microcontroller.
STEP 5
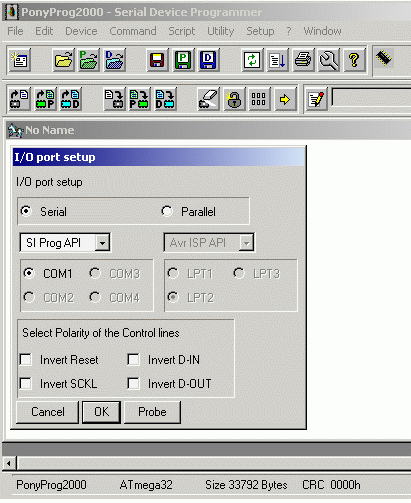
In the setup menu select "Interface Setup" option and configure the settings as shown above in the I/O port setup dialog.
Select the COM 1 option. Make sure your computer has a working COM 1 port at the back of the machine.
STEP 6
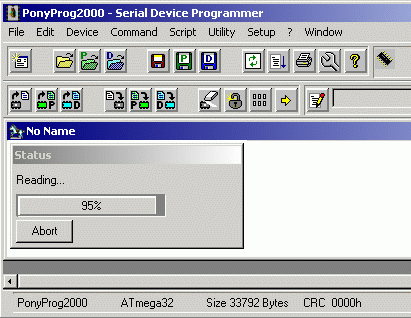
In the "Command" menu option, select the "Read All" option to begin reading the contents of the controller chip. If the cable is working, and the computer’s COM 1 port is working, then you should see something like in the screenshot above.
This Article Continues...
ATMega32 16 MHz Fuse BitUsing PonyProg Software
ATMega32 Default Fuse Bit Settings
ATmega32 CKSEL Options
ATmega32 CKOPT Fuse
ATmega32 SUT CKSEL Fuse Bit
ATMega32 JTAG Fuse
16 MHz Crystal Fuse Bit Configuration
ATMega32 Chip Recovery